The AB Electronics UK Knowledge Base provides support solutions, tutorials and troubleshooting guides.

MicroPython Libraries to use the ADC-DAC Pi development board with the Raspberry Pi Pico development board.
The example python files can be found in /ABElectronics_MicroPython_Libraries/ADCDACPi/demos.
Downloading and Installing the library
To download to your Raspberry Pi type in the terminal:
git clone https://github.com/abelectronicsuk/ABElectronics_MicroPython_Libraries.git
To install the MicroPython Library use the Thonny Python IDE from thonny.
Create a file for your chosen board and copy the contents of the python file into that board's directory. For example for the ADC-DAC Pi create a new file in Thonny called ADCDACPi.py and copy contents from ADCDACPi.py into the new file and save it onto the Raspberry Pi Pico board.
Create a second file where your main program will reside and import the board library at the top of the program.
from ADCDACPi import ADCDACPi
Run with "Run Current Command" or F5 in Thonny.
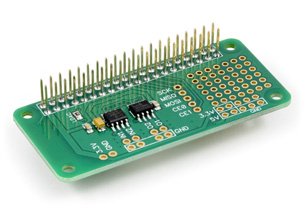
Pins used on the Raspberry Pi Pico:
The ADC-DAC Pi library uses the following pins on the Raspberry Pi Pico board.
| Pico Pin | Pico GPIO | Function | Pi Pin | Pi GPIO |
|---|---|---|---|---|
| 4 | GP2 | SPI SCK | 23 | GPIO 11 |
| 5 | GP3 | SPI0 TX | 19 | GPIO 10 |
| 6 | GP4 | SPI0 RX | 21 | GPIO 9 |
| 7 | GP5 | ADC SPI CE0 | 24 | GPIO 8 |
| 25 | GP19 | DAC SPI CE1 | 26 | GPIO 7 |
To use a different pin, you can edit the ADCDACPi.py on lines 24 to 36.
You will also need to connect 3.3V, 5V and GND on the ADC-DAC Pi GPIO header.
Wiring Diagram:

Functions:
Initialising the ADCDACPi object.
adcdac = ADCDACPi(gain_factor)
Parameter: gain_factor - 1 or 2 When the gain is set to 1 the voltage range of the DAC will be 0 to 2.048V. When the gain is set to 2 the voltage will be 0 to 3.3V
read_adc_voltage(channel, mode)
Read the voltage from the selected channel on the ADC
Parameter: channel - 1 or 2
Parameter: mode - 0 = single ended, 1 = differential
Returns: number as a float between 0 and 2.048
read_adc_raw(channel, mode)
Read the raw value from the selected channel on the ADC
Parameter: channel - 1 or 2
Parameter: mode - 0 = single ended, 1 = differential
Returns: int
set_adc_refvoltage(voltage)
Set the reference voltage for the analogue to digital converter.
The ADC uses the raspberry pi 3.3V power as a voltage reference so using this method to set the reference to match the exact output voltage from the 3.3V regulator will increase the accuracy of the ADC readings.
Parameters: voltage
Returns: null
set_dac_voltage(channel, voltage)
Set the voltage for the selected channel on the DAC. The DAC has two gain values, 1 or 2, which can be set when the ADCDACPi object is created. A gain of 1 will give a voltage between 0 and 2.047 volts. A gain of 2 will give a voltage between 0 and 3.3 volts.
Parameters: channel - 1 or 2, voltage - target DAC voltage
Returns: null
set_dac_raw(channel, value)
Set the raw value for the selected channel on the DAC
Parameters: channel - 1 or 2, value int between 0 and 4095
Returns: null
Usage
To use the ADCDAC Pi library in your code you must first import the library:
from ADCDACPi import ADCDACPi
Next, create an object called 'adcdac' from the ADCDACPi class and set a gain parameter of 1 or 2 for the DAC:
adcdac = ADCDACPi(1)
Set the reference voltage.
adcdac.set_adc_refvoltage(3.3)
Read the voltage from channel 2 and store it in a variable called x.
x = adcdac.read_adc_voltage(2)